No, I am not the 'old girl' in the title, although I really feel that I could do with some sort of re-vamp, having had my 65th birthday last week! At the time we were away in Gemsquash, as we were last year, so we have started another family tradition, let's hope there are lots of birthdays ahead to carry it on. But, as usual I digress, and my next blog will be all about the wonderful time we had.
The 'old girl' is actually our dear old Gemsquash herself. She is a vintage caravan really, (or is that veteran? Or classic? Or simply old?), as she first hit the road in 1981. So, we decided to do a couple of things to spruce her up. I had already made new blue and white striped curtains for her, cleverly made from a huge, quilted bed cover that we brought with us when we moved and had never used! After much unpicking and measuring and cutting and sewing, voila, brand new curtains. And they made a huge difference in brightening up the interior. So, our thoughts turned to the walls which were plain marine ply. Sturdy and brown and boring! Off to the paint shop where we chose the palest of grey for the final coat, and armed with sandpaper, undercoat, rollers, brushes and paint tray, we headed home to tackle the job!
 |
| Still smiling at this stage! |
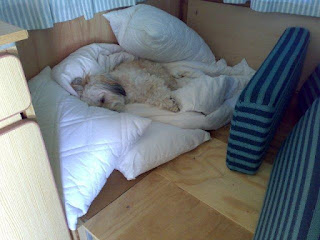
Alfie was horrified as we literally stripped everything from inside and he refused point blank to return until the cushions were replaced and the bed was made!
 |
| Alfie left soon after this picture was taken. |
 |
| The bed has gone! |
Suddenly we were faced with acres of wall to paint and what seemed a good idea at the time started to fade a little as we strained our shoulders and neck sanding every piece of wall and getting into and under all the nooks and crannies that a caravan has. Plus, a caravan is not the largest of spaces anyway and Rob and I were doing soft shoe shuffles every time we wanted to change ends! I was doing the twiddly bits around the windows and cupboards and he was in charge of the roller. The undercoat looked ghastly, patchy and thin and I was wondering whether we would manage to cover the wood properly. We left it for two days to dry properly and then we did the first coat of grey. What a difference, we just loved it. The second coat went on the next day and the walls shone with pride! So did we, and aching muscles aside, we were very pleased with the result.
 |
| Compare this picture to the 'before' shot! |
But, we were not yet finished! The knobs on the cupboard doors needed replacing as there were two different kinds. As the original plastic knobs had broken over the years, they had been replaced with wooden ones, so off they all came and we bought lovely stainless steel ones to match the grey walls! See, we planned it all very carefully!
 |
| Alfie approves! See the new knobs? |
But, we were still not finished! The curtains had originally been on stretchy wire and although it is practical, it isn't pretty, so Rob bought curtain track instead and we used proper hooks!
But, we were still not finished! Off we went to track down new flooring and found the perfect one, a soft yet tough floor covering in a mock limewashed wood pattern which would bring out the colours of the walls and reflect the new door knobs. It was perfect and we enquired the price of just 3 metres. We gasped, gulped and left!
Who needs a new floor, the old one is perfect for the next 30 years!!

1 comment:
ok now I can see the difference - the before pics help a lot!!
Well done - good effort :-)
Post a Comment